Showing posts with label cabochons. Show all posts

Wednesday, 7 December 2011

Leather Cuffs – Special Offer

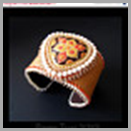
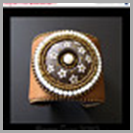
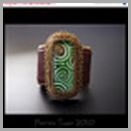
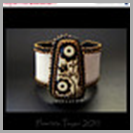
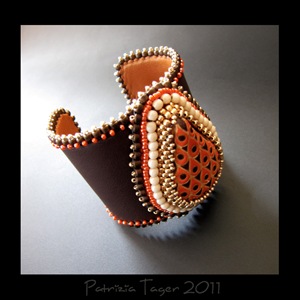
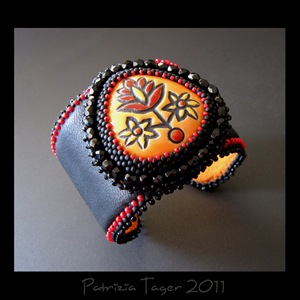
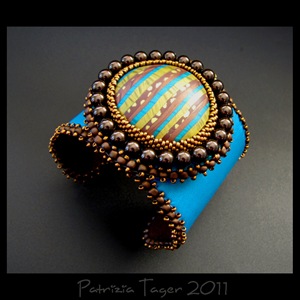
I’m having a pre-holiday SALE on all my bead embroidered leather cuffs.

From today till the 27th December 2011 I’m offering 20% off all leather cuffs in my shop!

image image image image 

image image image image

image image image image 

image image image image

image image image image

image image image

In addition…. exclusive to my blog readers… enter code WORLDFREESHIP at checkout to receive free worldwide shipping on ANY item in my shop!!!

This offer expires on the 27th December 2011!

For the Leather Cuffs SALE, please see: http://www.etsy.com/shop/triz?section_id=7653830

For other SALE items also check out: http://www.etsy.com/shop/triz?section_id=5361311

Monday, 17 January 2011

Leather Cuff Making Frenzy! Part 2

So the madness continues…. I just cannot stop making these cuffs!!! I really love making them and I really love how they turn out!!! 

I even started on a new bead-embroidered bag, when one quarter of the way through, I found myself back on the leather cuffs… and the next thing I know four more were made!!!

Here are those four + the previous ones that I didn’t get a chance to post yet (cos I was busy making leather cuffs :-D).

As there are so many, I’m just going to post the photos, if you are interested in finding out more about them, please click on the photos for detailed information.

Peach Bouquet - Cuff 02 copy Trillium - Orange Leather Cuff 01 copy

 Rock My World - Black Leather Cuff 01 copy Moroccan Spice - Brown Leather Cuff 03 copy

Black and Bonze Flowers - Ivory Leather Cuff 01 copy Orange & Red  Flowers - Black Leather Cuff 03 copy

Naftali turquoise & brown - Leather Cuff 01 copy Brown, Gunmetal & tan stripe - Tan Leather Cuff 05 copy

 Bronze & Turquoise Flower - Brown Leather Cuff 03 copy

Top two, 2nd row right, 3rd row: cabs by Golem Design Studio

2nd row left: heart cab by MAKUstudio

4th row: striped cab by Naftali

I hope I haven’t overdosed you on leather cuffs!!! I promise I will do my upmost to stay away from them for a while…. or at least till I finish making the bag!!! :-)

Wishing everyone a wonderful week ahead!!! :-)

Tuesday, 21 December 2010

Leather Cuff Making Frenzy! Part 1

Yesterday I mentioned that I’ve been on one of my mad-shut-myself-in-my-room-for-over-a-week-beading-frenzy…. and I made 9 leather cuffs… well here are the first 3:

Forget Me Not - Turquoise Leather Cuff

Forget Me Not - Cuff 02 copy 

Sugar and Spice - Caramel Leather Cuff

Sugar and Spice - Brown Leather Cuff 01 copy

 
Red Flowers on Red Leather - Cuff

Red Flowers on Red Leather 01 copy

All 3 were created around Golem Design Studio’s gorgeous handmade stoneware, on leather covered cuffs… I have 6 more cuffs to post… but after spending the day taking photos and working on them… I am calling it a night!!! :-)

You’ll just have to come back in a few days to see the next lot! :-)

Happy beading!

Sunday, 12 September 2010

Volcanic Collection – 4 New Pieces!

It all started off with me receiving some absolutely stunning cabochons and buttons from MAKUstudio… and that was an accomplishment in itself!!! Every time a new cab was posted on her facebook fan page, I would click on the link and…. it would be already sold!!!! Am not surprised because her pieces are so yummy… anyway, so I managed to put an order in and received them about a week later… and got out the few I had bought from her a while ago…. and all I could think when looking at these gorgeous pieces was…. fire… earth… lava… volcano… ancient… tribal… primitive…. so I gathered my beads (another accomplishment as they are spread all over my flat) and started to bead my first piece which is designed for the Bead Art Originals “No Bones About It” September Challenge. We are supposed to design a piece inspired by the TV character Temperance Brennan from the series "Bones."

The character, Temperance Brennan, is a forensic anthropologist who works together with the FBI to solve murders. She is often seen wearing gorgeous tribal and ethnic jewellery and I love this series!!!! :-)

Her jewellery style and her profession inspired me to design this gorgeous primitive/tribal-influenced piece featuring two of MAKUstudio’s gorgeous cabochons (actually the top one is a button that I used as a cab).

Volcano Goddess – OOAK Necklace

volcano goddess - OOAK Necklace 02 copy
Then as soon as I finished this, I got loads of ideas for making more pieces with MAKU’s raku ceramic cabs…. first came the cuff:

Volcanic Rock – OOAK Cuff

Volcanic Rock - OOAK Cuff 04 copy
then another necklace…

Volcanic Rock – OOAK Necklace

Volcanic Rock - OOAK Necklace 04 copy

(both the necklaces and the cuff above use all MAKUstudio raku ceramics)

and then of course the earrings…

Volcanic Rock – Earrings

Volcanic Rock - Earrings 02 copy
and I wanted to make more… but I run out of dark copper beads and almost the black ones too!!! (more ordered and on their way!)

So I put this collection aside… and started a new one! Still have to work on the photos and decide on a name…. but I’ll tell you this, the colour combination for it is coral red, black, ivory and gold… and it is GORGEOUS!!!! and I made THREE necklaces and THREE bracelets!!! I’m in a total beading frenzy!!!! and…. just now as I was typing, the doorbell rang…. the postman is here with my order of copper and black beads!!!! The only problem is, I actually run out of Fireline… my dad, who is coming to Israel on Tuesday is bringing me loads…. so I guess no beading till then :-) and just as well as I have loads of work to do for my ‘real’ job! :-)

Wishing everyone a wonderful week ahead! :-)

Friday, 5 February 2010

Fusing glass

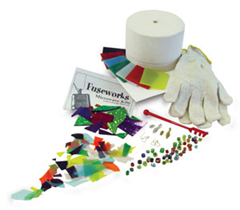
As I mentioned a couple of weeks ago, I had this crazy idea that I wanted to somehow fuse glass… anyone who knows me pretty well, knows that I often go off into these crazy ideas and before you know it I have bought all the equipment necessary (and a few dozen books) in order for me to try “something new” out!  Some of the things I tried in the past are: photography (I still have my black and white darkroom set up amongst all my son’s toys), pottery, fabric silk screen printing, fashion design (actually got a degree in this),  law, politics (managed to get a diploma in Social Policy and Criminal Justice – very useful :-D), beading (at least this one stuck),  polymer clay (I have a huge box of unused Fimo and a pasta machine),  etc…. and so it was to no surprise to any of my friends when I announced that I wanted to melt glass at extremely high temperatures. :-)

So I started researching on the net… and asked a few people for advice…  and finally decided that a “proper” kiln was a bit too much money (kilns start at around $500 and go up into the thousands) to spend on a new endeavour  that I had no idea whether I would like or not…. so I opted for a Microwave-kiln.    I bought the kit, first because it was the same price as buying the kiln on its own, second because as I’ve never done this type of thing before I had no idea what I needed to get me started.
image 

Well I finally got my kit yesterday… and was extremely eager to start!!!!

My first attempt was a joke :-) I stupidly thought that glass would be transparent so I sandwiched a piece of dichroic glass in between 2 blue ones…  see below… that little black thing in between is the hidden dichro…

IMG_3321

…..I laughed… and learned…

the second attempt, although I managed not to bury the detail, looks like… well… like someone had too much to drink and brought last night’s party back up :-)

 IMG_3322
and the third one…. well…. at least heading in the right direction…


IMG_3324

….still not a great thing of beauty… but at least it doesn’t look like something you bring up after a bad night of drinking! :-)

So here is what I have to say about the microwave kiln:

It’s fun and quick and definitely recommend it if you just want to try it out and make really small pieces of fused glass (max 1 1/4”), which is limiting, especially for me, as I like working on a larger scale.

If you buy the kit make sure you buy a separate selection of glass and dichro because the selection that comes in the box is pretty naff!!! and make sure you buy some clear glass (I assumed it would come in the kit but it didn’t) because I think that is the trick to finishing off the piece making it look a bit less “crafty” and a lot more professional.  Also,  make sure you buy some extra kiln paper (which I did), because the kit only comes with enough paper to probably make about seven or eight 1” squared cabs… and I promise you they will be used up within the first 2 days!

I’ve only been using it for a couple of days now and I’m glad I got it but it’s given me a taste for wanting more and wanting to make bigger pieces…. so here we go, I have to start saving up for a kiln!!!  but until I managed to save up the money for it, this will do me fine and will let me experiment (with limitations) a bit!

Now back to my microwave! :-)